How I Decorated My Narrow Entryway with a Tapestry
My apartment, like many Portuguese homes, has that long, narrow entryway that’s so tricky to arrange and decorate. After thinking it over for ages, I finally settled on a solution and today, I’m going to share how I decorated my narrow entryway with a tapestry.
(I share brand products I genuinely like. I have no affiliate links or sponsorships, just honest opinions.)
The aesthetic of the apartment was what sold it to me. The previous owners had renovated it a few years earlier, giving it a rustic charm that reminded me of a mountain chalet, with beautiful touches of natural wood and stone.
When we moved in, we had other priorities and immediate expenses, so the entryway didn’t get much attention. I simply hung a few frames on the wall and left it at that. But last December, after updating a few awkward and outdated areas of the home, the entryway ended up completely bare, like a blank canvas, waiting for us to decide what to do with it.
Planning the Layout
My apartment has an L-shaped layout, which means there are two corridors that connect all the rooms. The first one, leading from the front door, is longer and narrower than the second, which intersects it. To give you a sense of the space: that first corridor is about 9 metres long and just 1 metre wide, with two main walls running along it.
One thing we knew for sure was that we needed a shoe rack. It seemed obvious to place it on the wall closest to the door, but even the narrowest cabinet would take up too much space. It just wouldn’t be practical. So we had no choice but to position the shoe cabinet on the second wall, near the intersection where there’s more room to move around.
That left me with one long, bare wall to work with, and I ruled out the idea of a gallery wall straight away. The ceiling in the corridor is lower than the rest of the house, and I felt that a cluster of small frames would only make the space feel more cluttered. I wanted something simple but bold. Over time, I found myself more drawn to large-scale pieces, because they keep things minimal while still making a statement.
But large artwork can be expensive, and I wasn’t willing to spend hundreds of euros on something I might tire of in a year. After a lot of searching and comparing options, I thought that hanging a tapestry might be the perfect middle ground. Of course, even large tapestries can be pricey, so I spent a few days browsing different websites and weighing up sizes, colours and styles. Eventually, I came across a vintage-style carpet on Benuta that really caught my eye.
And since they were having a sale, that sealed the deal.
Choosing the Right Tapestry
I definitely wanted to maintain the rustic aesthetic of the apartment, so I leaned toward more organic-looking pieces with vintage or classic patterns. My ideal palette included neutral tones like terracotta, ochre, soft greys and beiges, as these shades complement the natural materials used in other rooms. I also wanted something with texture, as it would add depth and warmth, helping to enhance the cosy, welcoming atmosphere I was aiming for.
The Hanging Process
There are quite a few ways to hang a tapestry on a wall:
- Hooked-Up Rack: Mount a rod on the wall and use hooks or clamps to hang the tapestry.
- Rod with Hem: Similar to the first, but the tapestry has a sewn hem that slides directly onto the rod.
- Velcro Adhesive: A quick solution using adhesive Velcro strips. Not recommended for heavier pieces, as the glue may not hold over time.
- Framing: A clean and structured look—framing the tapestry like traditional artwork. Beautiful, but can get expensive with large pieces.
- Quilt Clamps: Wooden supports screwed into the wall that clamp the tapestry in place. Both functional and decorative.
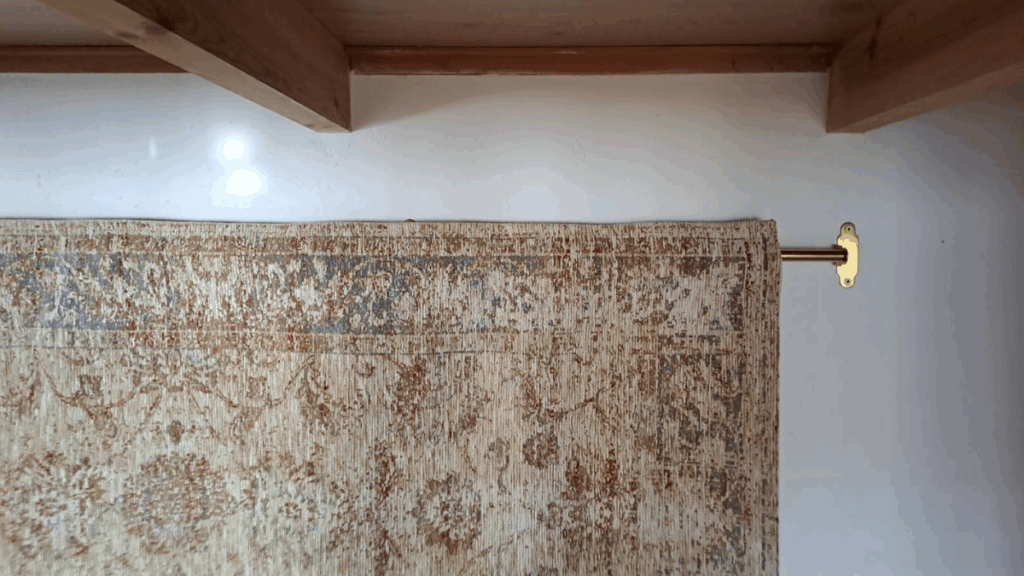
In my case, I had to consider the weight of the rug. The piece I chose is about 1.65 metres long by 0.85 metres wide, with a 5mm pile. I’m not sure of the exact weight, but it’s certainly not lightweight, so weaker supports were out of the question.
I also wanted to elevate the look a bit and give it more structure, so I went with a rod system. I used three HULTARP rails from IKEA (each 60 cm wide) to span the length of the tapestry. To hang it, I repurposed a few items I already had at home to keep costs down: KRONILL pleating tape and SY iron-on hemming tape, also from IKEA.

With the tapestry laid flat, I ironed the pleating tape just below the top edge. At first, it didn’t seem like it would stick, but once it cooled, it adhered surprisingly well.
The Result
The whole DIY was pretty straightforward and took me about two hours to complete. In terms of size, the width felt spot on, though I do think I could have gone for a piece that was 100 cm tall instead of the 85 cm I chose. Still, I absolutely love how it turned out.
As for the cost, the tapestry was around €39 (including shipping), and the rails added another €21. So no, it wasn’t the cheapest DIY, but compared to other options, I think it was a smart and stylish compromise.
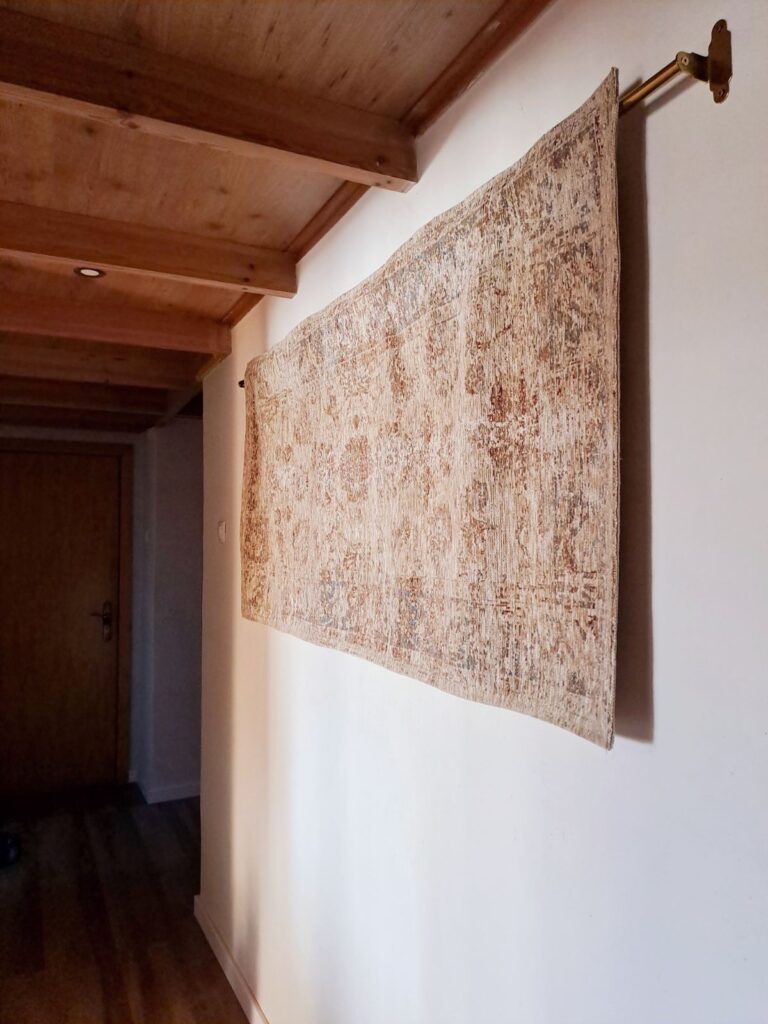
Overall, I’m really happy with the result. The tapestry brings that little “wow” factor to the entryway, and the warm tones and texture instantly made the space feel cosier and more welcoming.
While the entryway is still a work in progress, this was a big step in the right direction, and it finally feels like it’s starting to reflect the rest of our home.
If you’d like more cosy ideas for your home, check out my last post on How to Make Your Home Feel Cosy and Welcoming